Showing posts with label misc recipes. Show all posts

Monday, December 3, 2012

Pretty Pink Peppermint Marshmallows!


 I had never made homemade marshmallows before, but I've always wanted to!  One, I never had a stand mixer (I totally do now!!! AND I got it for free!!!) and two, I was scared they wouldn't turn out... My first batch TOTALLY didn't turn out, so I was right to be scared!  I figured out my candy thermometer was off, so I tried again with a totally different recipe and cooked it to a lower temperature (according to my thermometer) and they turned out FABULOUS!  These are totally amazing... like the best marshmallows EVER!


Homemade Marshmallows

2 envelopes unflavored gelatin
1 cup cold water, divided
2 cups sugar
1 cup light corn syrup
dash salt
1 tsp vanilla or peppermint extract
1 drop food coloring, if desired

Sprinkle a 9x13 pan with powdered sugar.  In the bowl of your stand mixer, sprinkle the gelatin over 1/2 cup of water.  Set aside.  In a large heavy saucepan, combine the sugar, corn syrup, salt and remaining water.  Bring to a boil, stirring occasionally.  Cook, without stirring, until a candy thermometer reads 240° (soft-ball stage).  Remove from the heat and gradually add to gelatin.  Beat on high speed until mixture is thick and the volume is doubled, about 10-15 minutes.  Beat in vanilla or peppermint extract.  Spread into prepared pan.  Cover and let stand at room temperature for 6 hours or overnight. If you sprinkle the top with powdered sugar, the plastic wrap won't stick to the mixture.  Cut the marshmallows into 1" squares with a knife or pizza cutter sprayed with cooking spray or sprinkled with powdered sugar.  Roll each marshmallow in powdered sugar.  You could roll them in colored sugar or sprinkles instead, if you like.  I drizzled poured melted chocolate on top of some of mine and sprinkled them with smashed up candy canes after they were powdered sugared... They were fabulous!!!


Don't laugh at my first batch:


It may look nice and pink & fluffy like a cloud, but the texture was like RUBBER!  You could seriously bounce it on the table!  We ripped pieces of the rubber mass off and put it in hot cocoa and it melted down nice & fine, but WOW...  I made pink sugary rubber.  Apparently this is what happens when your mixture cooks to a hard crack stage due to a candy thermometer that is out of whack.  At least the rubber tasted good in hot cocoa *grins*

Friday, September 21, 2012

Pretty White Pumpkins & Make Your Own Pumpkin Pie Spice


I whipped these guys together in less than an hour using an old shower curtain!  Aren't they beautiful?  I'm so excited to start decorating for Halloween!


Now that we're into the fall season, so many recipes call for Pumpkin Pie Spice... A lot of people don't keep it on hand because it's so pricey, but it's very easy to make yourself!  Plus, all the ingredients can be found at the dollar store and most likely they're in your cupboard already!

Pumpkin Pie Spice

1/4 c. cinnamon
1 T nutmeg
1 T ginger
1 1/2 tsp cloves

Mix together well.

Monday, August 27, 2012

Completely Homemade Dulce de Leche (no sweetened condensed milk)


Although I LOVE using mixes and store-bought conveniences to give me a head start on recipes, I've been spending more time recently making things in old fashioned ways.  It takes a lot longer to make things homemade, but they're good skills to have.  I blame it on my emergency preparedness mentality.  In long term survival situations we'll need to know how to make things from scratch.  It's part of becoming self reliant. 

Plus, when you make things homemade you know exactly what is in them, which is nice!  Dulce de leche is something I grew up on because it's something my mom grew up on.  My mom always made it by boiling an unopened can of sweetened condensed milk until it was caramelized.  It's how her maid did it when she was growing up in Mexico. 

I love the taste of dulce de leche cooked that way, but I'm a little scared of the can exploding.  I've never actually seen a can of sweetened condensed milk explode, but I guess it could happen.  Dulce de leche is a South American treat that's been around for quite a while, but a lot of people aren't familiar with it.

This recipe makes a LARGE batch of dulce de leche... even once it condenses down it's still a little over half a gallon.  Dulce de leche is great on toast, pancakes, Maria's cookies, cake, rice pudding or ice cream.  It has a very unique caramel flavor.  It's a great way to use up close-dated milk.  Place it in milk bottles or canning jars for a fun neighbor gift!

My technique was not exact, but I want to share it with you anyway.

Homemade Dulce de Leche

1 gallon milk (I used skim)
4 1/2 c. sugar
1 T. vanilla
1 tsp salt

Bring to a boil in a very large stockpot.  Boil gently stirring very often for a very long time until it condensed to about half and becomes golden and thick.  Mine cooked for around 3 hours on the stove top with me stirring quite often and then I added a heaping tablespoon of baking soda, let it foam up while stirring constantly and then placed the mixture in my crockpot on high with the lid cracked for another 4 hours so I could run errands.  When I got home I stirred well and it had come to the consistency I was going for.  I think it wouldn't take near as long if you used a higher fat content milk.  It would probably cut the time in half or more to use whole milk.

Store in the fridge.

**Note** I read a tip somewhere that you can place a clean saucer/plate in the bottom of your pot while making dulce de leche and the rocking of the plate in the boiling mixture will help it from burning and make it so you don't have to stir constantly like you do when making homemade caramels... I tried it and it worked for me.  Most dulce de leche recipes say you have to stir constantly... for HOURS, but the plate took care of a lot of the stirring. 


Wednesday, June 20, 2012

Homemade Yeast Facial Mask


We love making homemade beauty products!  Spa night at home is tons of fun!  Nina's friends like to participate with us too!  We've tried so many different products... we love it!

Yeast Cleansing Mask

This mask is really nice for taking the shine out of your face and evening skin color. Use weekly. Yeast is great at absorbing excess oils.  This is Nina's favorite recipe.

1 T dry yeast
3 drops lemon juice
2 tsp water

Mix together in a small bowl until a thick paste forms. Add more water if necessary to make it spreadable. Pat onto face, avoiding eyes. Allow to sit for 10-15 minutes. Rinse with warm water. Pat dry.


 You can see how matte their faces look afterward!  It's almost like they're wearing foundation... fabulous!

Saturday, April 14, 2012

Cooking it Up on Vacation: Saving Money by Eating in Your Hotel Room


Our spring break Las Vegas trip was so much fun!  One thing that worked out really well for us financially since we had a large group was not eating out at restaurants during our vacation.

Even doing fast food we would have spent a minimum of $30 at each meal, which adds up fast over five days! Our room had a kitchenette with a small fridge, microwave and sink.  All of our "cooking" was done with only those appliances.  I shopped at home to be sure I got the best deals available instead of paying Vegas grocery store prices.  When the kids and I went to San Diego two years ago we just bought our food at a grocery store there since we didn't have much car space.  This trip we had more space so I saved even more money by hitting sales and couponing.

Day 1:
Breakfast- (in the car) muffins, bagels w/cream cheese, bananas

Lunch- (stopped at a park) leftover turkey, rolls, jello salad and potato salad from our Easter dinner, cheese puffs

Dinner- peanut butter and jelly, chips

Day 2:
Breakfast- muffins, yogurt, bananas

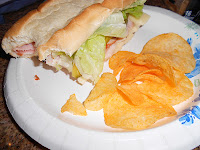
Lunch- meat and cheese sandwiches on hoagie buns with all the fixings, pickles, chips


Dinner- chicken patty, ham and swiss sandwiches on hamburger buns, instant cheesy mashed potatoes, green beans (all cooked in the microwave), pickles

Day 3:
Breakfast- cold cereal w/milk, yogurt

Lunch- polish dogs w/ff vegetarian chili, fruit cocktail, bbq beans, pickles, chips


Dinner- Easy Mac, Cup O Noodles, chips, leftovers for the kids... the grownups tried out the hotel restaurant!


Day 4:
Breakfast- scrambled eggs, sausage, tortillas, bananas, orange juice


Scrambled eggs are very easy to cook in the microwave!  Grease your microwave-safe dish well and add 1 tablespoon of milk or water for every egg.  I did 18 eggs for our large group.  Whisk well.  Microwave on high stirring after every minute for less than six eggs or every two minutes for a larger batch until they are almost done.  Continue to stir until the heat of the eggs finishes cooking the rest and you're done!  Perfectly pretty and delicious scrambled eggs in the microwave!  

Lunch- meat and cheese sandwiches on bread or hoagies, chips, pickles, leftover beans, applesauce

Dinner- bean enchiladas, loaded nachos, olives


Bean enchiladas are a quick and easy hotel room dinner idea that can be cooked in the microwave.  You simply fill the tortillas with canned refried beans (I use fat free) and shredded cheese, roll them up and top with canned enchilada sauce and more cheese.  Heat until the center is hot and the cheese is melted.  You can garnish with sour cream, chopped lettuce, tomatoes and olives, if desired!

Day 5:
Breakfast- cold cereal w/milk, yogurt

Lunch- (in the car) variety of sandwiches, chips, applesauce, pickles

We were back home at dinner time!

By purchasing food ahead of time and cooking in our room we not only saved money, but even though a lot of what we ate was "processed", we still ate healthier than we would have eating out every meal.

I also made sure to have lots of snacks and drinks on hand for both the car ride AND in the room for starving bellies after swimming! 

My meal planning had to be creative knowing there was no stove or oven to use.  If you prefer to be less creative you can pack an electric griddle, crockpot or toaster oven for additional cooking sources.

Everything we ate was delicious and kid-friendly!  Our vacation menu was a success!

Monday, February 27, 2012

I *hate* Zits! Homemade Zit Cream

I always had clear skin as a teenager and a young mom...  Around the time I hit my upper 20s my skin started to break out a lot.  *pout* Now that I'm well into my 30s *double pout* I have more zits than ever!!! 

Nina and I really like making homemade beauty supplies.  We use them a lot!  I discovered homemade zit cream and use it all the time!  With three girls in our house zit medicine can get pricey!  Now this isn't any miracle cream, but it works just as well as the stuff you buy in the store at hurrying up the healing process of pimples.


Zit Cream 
Use daily on pimples for best results.

 honey
Cinnamon powder
 
Mix the honey with some cinnamon powder (enough to make a paste). Dab on your pimple and leave for about 20 minutes. Rinse off with lukewarm water.  If you are adventurous apply before bed and wash off in the morning.

Honey was used back in the day to heal wounds (and still works great for that!) and cinnamon is a natural antiseptic so together they work great on zits!

Saturday, November 5, 2011

Delicious Cranberry Butter & Cranberry Sauce Recipes


Every year I make Cran-Apple Sauce to can.  It's a little different tasting than regular cranberry sauce and very good!  When I was canning the delicious stuff this year I had 1/4 cup left that didn't fit into a jar.  I simply whipped it up (still warm) with 1/4 cup of butter and served it on corn bread.  It was delightful!!!  I'll be making cranberry butter more often now!  This would work fabulously with any leftover cranberry sauce you have this holiday season.  I think this butter would be so good on a turkey sandwich!  Yummy!

If you've never made your own cranberry sauce, it's so easy and delicious.  If you do cran-apple sauce it can be less expensive as well... especially if you're doing larger batches to can.  Both recipes follow:


Cran-Apple Sauce

20 apples
2 12 oz bags fresh cranberries
2 c. sugar
3 c. apple juice

Wash fruit. Sort berries. Peel, core and finely chop apples. Mix all ingredients in a large pot with lid. Cook for 5 minutes covered, stirring often. Remove lid and boil for 20 minutes, stirring every couple of minutes. Keep hot while filling sterilized pint jars. Process 15 minutes. Makes 7 pints.

If you are making the cran-apple sauce to use within the week, don't worry about processing... just place the jars in your fridge and serve chilled.


Homemade Cranberry Sauce
 
1 c. sugar
1 c. water
1 12 oz pkg fresh cranberries

Boil the sugar and water together. Add the cranberries and bring to a boil again. Let it boil for 10 minutes or so, stirring often and squishing cranberries until it looks all pretty and saucy. Be careful, they pop as they cook and although it's really cool to hear them, they can splatter hot stuff.

Enjoy!

Monday, October 10, 2011

Make Your Own Blood for Halloween!


Blood is disgusting, but something that is part of Halloween for most of us.  Buying fake blood at Halloween stores, or even Walmart can get pricey if you need more than just a tiny bit.

The good news for us creepy Halloween people is blood is super easy to make.


Funny story about this picture.  It SEEMED like my lovely daughter was taking a picture of her mom getting her blood applied... but alas, she was PRETENDING to take a picture of me so she could get a picture of the "cute" boy behind me so she could show her friends. Haha!  Teenage girls!

corn syrup, chocolate syrup and red food coloring


with coffee grounds
Homemade Blood

corn syrup
red food coloring
chocolate syrup
used coffee grounds

Corn syrup and food coloring alone make nice blood, but chocolate syrup adds a nice rusty red color.  Just mix until you have a nice color.  When you add in the coffee grounds it adds nice chunkage.


corn syrup and red food coloring
Let me describe to you our bloody zombie movie extra experience.  We stood in line watching people get their blood on, waiting for our turn.  I hate feeling the stickiness of Halloween makeup, so I was dreading it, but I didn't know how gross it would be. 

At first the blood smelled yummy and chocolatey and tasted good as it was applied to my lips.  The makeup artist let the blood run down our cheeks and chin to look like we had been feasting.  It was cold and sticky and disgusting.   It ran down my shirt and pooled in my bra.  I can't even begin to describe how gross it felt to be covered in corn syrup like that.  It was all over my neck, so when I looked down my chin would stick to my neck.  Whenever a breeze blew my hair would stick to my face and neck.

Several times during the morning the makeup artists would stop by saying our makeup looked "dry" or that we needed more applied.  Throughout the day I went from having my face and neck bloody to having them add blood to my back, my arms, my hair and basically anywhere that could be seen.

More and more cold, sticky blood pooled up in my bra.  Every time I tried to pull my shirt away from my chest it was like getting waxed.  Thank goodness I have no hair on my chest! haha!  The yummy chocolate smell wasn't so yummy after an hour.  They had us put the mixture in our mouth and swish it around to get a bloody look to our teeth.  I thought I was going to puke swishing that sweetness around on an empty stomach.

Our zombie scenes involved us chasing a girl... over and over and over.  The wind would blow our hair into our face, we would sweat and the smell of corn syrup and chocolate was strong.  We could taste the sweetness on our lips as they kept adding more and more blood to our mouth areas and it was sickening.

I have never felt so disgusting!  That was the best shower I've ever had when I got home!  All four layers I had on my top were glued to each other and to my skin.  I had to put all my clothes in the wash together because they couldn't be pried apart.  The good news is the mess washed off my skin and hair easily.

It was a lot of mess and fuss for a short film that will be around 5 minutes long!  I had fun, but if I ever have to have corn syrup down my shirt again I will probably scream!

Happy Blood-Making!

Nina's vampire blood from last year

Monday, August 29, 2011

Homemade Finger Paints


 What possesses someone to willingly let small children paint with their hands?  It's either craziness or a love for the excitement you see in children's eyes... I haven't decided which!

I promised Sadie I'd let her finger paint as soon as her mom sent a "painting shirt" with her so we didn't ruin her clothes.  A couple days later she was set with her shirt.  All day she kept asking, "Can we finger print now?"  And every time I'd say, "Finger PAINT".  But she never caught on to the difference! haha

 This is the easiest recipe and kids love it.  It makes quite a bit of paint, so I only dish out half and put the other half in the fridge for another day.  It's really inexpensive and fast time make.

Homemade Finger Paints

2 cups cold water
1/2 c. corn starch

Mix water and corn starch together in a small sauce pan over high heat.  Bring to a boil whisking the entire time.  When it thickens remove from heat and let cool.  Divide into small dishes and add food coloring into each.  Once totally cool the paint is ready!  If it's been stored in the fridge you may need to warm it up just a bit to make it usable.


Monday, November 29, 2010

Homemade Turkey Stock & Turkey-Cranberry-Stuffing Casserole Recipe


I started making my own turkey stock a while back and I'll NEVER go back to canned broth.  Turkey stock is pretty much amazing for making homemade chicken and dumplings  or chicken noodle soup... I even used it in my homemade stuffing (recipe will come tomorrow!).  If you still have a turkey carcass in your fridge from Thanksgiving, don't waste it!  It makes amazing broth!

To make homemade stock, place your turkey carcass in a large pot.  Cover with water.  Add celery carrots, onions, spices and anything else you'd like to add flavor.  Bring to a boil.  Reduce to a simmer, cover and simmer for 4 hours, stirring occasionally.  Strain and place in a covered bowl in the fridge over night.  The next day the turkey stock should be a jelly-like consistency.  Scrape off any fat that has risen to the top.  Scoop into jars or plastic baggies to freeze. Leave lots of head space in your jars, lots.  Turkey stock is the only thing I've ever had expand enough in the freezer to break the jars.  I usually get 10-14 cups of stock from one turkey carcass.  To serve or use in recipes heat until it's liquid again.

It's my goal to get a pressure canner someday semi-soon so I can start canning my stock and other things that need a pressure canner.  It would be nice to not have to freeze everything.  I'm crossing my fingers that we'll be buying a house soon.  We could be moving as soon as January and there's a nice big storage room in the basement.  I'll for sure need to start canning more!  HOORAY.


And speaking of turkey leftovers...


This was something I threw together Sunday night... It's easy and delicious!

Turkey-Cranberry-Stuffing Casserole

10 1/2 oz can of gravy or leftover gravy
2 c. leftover turkey
stuffing
1/2 c. dried cranberries (if desired)
cranberry sauce

Mix the gravy and turkey together.  Place in the bottom of a casserole dish.  Make the stuffing as directed on package, adding cranberries if desired, or use leftover stuffing.  Spoon the stuffing evenly on top of the turkey/gravy mixture.  Top with cranberry sauce.  I used cranberry-apple sauce.  Cover, bake at 350 for 20 minutes or until hot.

Monday, September 27, 2010

Campfire Boiled Eggs


This is Nina's "why are you taking a picture of me holding an egg?" smile :)


How many of you have boiled an egg in a paper cup before? I can't be the only one who thinks this is cool!


Place an egg in a paper cup full of water and place on hot coals.


The cup will burn down to the water level, but not further. The egg happily boils in the cup. Amaze your kids with this trick! Ok... maybe they won't be amazed, but they'll at least be mildly entertained! hehehe

Monday, March 8, 2010

Do It Yourself Pumpkin Pie Spice

Now we all know how much I love pumpkin pie spice. I use it all the time. I ran out lately and didn't want to buy more. I'm not sure why pumpkin pie spice is so pricey when all the spices that make it up are cheap. Here's a simple way to make pumpkin pie spice using cheap dollar store spices. I decided to keep mine in a cute little short fat canning jar. I love those jars! It took a double batch of pumpkin pie spice to fill him up.

Pumpkin Pie Spice

1/4 c. cinnamon
1 T nutmeg
1 T ginger
1 1/2 tsp cloves

Mix together well.

Sunday, August 9, 2009

How to slice a watermelon and core a pineapple...

Besides learning patience in the restaurant business (crazy customers and even crazier cooks) I also learned some prep cooking skills that I still use today :) Slicing melons and pineapples are a couple of those skills. So here is the step-by-step easiest way to slice up a melon (works for all melons) and how to core a pineapple.

Cut your melon in half. If this were a cantaloupe or other melon then you'll want to scrape out the seeds at this point.

Next slice the top off. Make sure you're working with a nice sharp knife.

Then you take off the rest of the skin, starting at the top and slicing down.

Very carefully make your horizontal slices.

Keep them all in a stack.

And then make vertical cuts one way and then the other.

Ta da! A simple beautiful bowl of cut melon.

And now for your delicious fresh pineapple (great raw or grilled... mmmmm)


First you chop the top off, then using a serrated bread knife, cut the pineapple into halves, then fourths, then eighths.

Next, using the same knife, slice the skin away. It's easiest if you don't slice all the way through the end, leaving something to hold onto. Leave enough skin that you avoid the eyes (the pineapple's eyes, not your own... LOL, although you should probably avoid those too!). Then you cut away the core, slicing all the way through the end you had left.


Serve as spears or cut into cubes... enjoy!