Showing posts with label guest bloggers. Show all posts

Thursday, April 12, 2012

10 Ways to Save Money at Amusement Parks: Guest Blogger

My name is Marie. I am a homeschooling, coupon cutting, organizing wannabe, diet Mt. Dew drinking military wife, blogger and mother of five. I have so many things that I want to be, but am not there yet! You know that phrase, “jack of all trades, master of none” ? Well that is me!

As a resident of Southern California, I am close to quite a few amusement parks.  While our family loves to go and play, I think we can all agree that they are not cheap. Because I have a lot of kids, I have to be really careful or I could spend their college tuition at the park!

Here are my top 10 ways (in no particular order) to save money at amusement parks:

1) Go online before you get to the park! Do not buy your tickets at the gate. Look for discounts through your work, the government, teachers association, homeschooler discounts…there are so many ways to get a discount.

2) Since we live within driving distance of parks, we rarely stay at a hotel. However, when we do, we always stay a bit away from the park. Rates are usually lower. I always look for a place that offers rewards points,  a government discount and a continental breakfast. If I am going to stay there, I am going to try and get something more for my money! Once again, pay attention to any discounts that may be available to you.

3) Go in the off season. I know that this doesn’t always work for everyone, but even pushing your vacation off a week or two can make a difference. We went to Universal Studios over Christmas break and could barely get through the crowds. Two weeks later we practically had the place to ourselves!

4) While I don’t know any park that allows outside food, most have to allow water. So don’t pay for an overpriced water bottle. Bring a refillable bottle in with you and refill through the day. You can also grab drink packets (like Kool Aid, Crystal Light…) from the dollar store and keep those with you.

 5) Don’t forget batteries! I think digital cameras are notorious for sucking up batteries. If you want to capture those moments, make sure to have plenty of extras. I like to go to a warehouse club and grab a nice big pack before I go.

6) When our family went to Legoland, our plan was to go to a fast food place close to the park for lunch. However, it turned out we would have to pay our parking fee again. We had to decide whether it was worth it or not.  There are a few things that we do, to help curb costs. Water only. From OUR water bottles. Just because you may not be able to leave the park, doesn’t mean you can’t go to your car. Keep a cooler filled with snacks and have a picnic at your car. You can have crackers, juice boxes, fruit, sandwiches etc. When we do eat in the park, if there is an all you can eat option, we take it. Our family is big, and we can eat a lot! If there isn’t an all you can eat, we look to see if there is a pizza place. Instead of buying individual meals, we can buy one that is a family size. Have two kids with similar tastes share one adult meal instead of two kids’ meals. 

7) My kids have never met a gift shop that they didn’t  like. Before we go inside, they are told whether or not they have an amount to spend.  Do not make up your mind in the store! Have it set in your mind what is acceptable. We do not go over it. Our family always buys a magnet for our  fridge, it is a great way to see all the places we have been.

8) Our family rule is, “if you can buy it at Target or Wal Mart, you are not buying it here”. I can’t count how many times my kids have brought me an item that they could easily get somewhere else. I also do not allow them to use their budgeted money on candy, food or drinks. Nope, not gonna happen!

9) Just because you are at an amusement park, you can still  find deals in their gift shops. At Six Flags I found my son a Scooby Doo pillow on clearance for $2. It is his “car seat pillow” and he uses it in the car all the time. Look in back corners for items on clearance.

10) Relax and have fun. Do not throw your budget out the window in the name of fun. It isn’t about what you buy, but the experiences shared.


Tuesday, May 24, 2011

Guest Blogger: DIY Shrinky Dink Garden Stakes


diy shrinky dinks

We just finished planting our garden today! We dug, we weeded, we watered and we GOT DIRTY! My kids, 2 and 5 years old, had so much fun! I so want them involved in watching things grow. I want them to know and experience God's creation first hand!

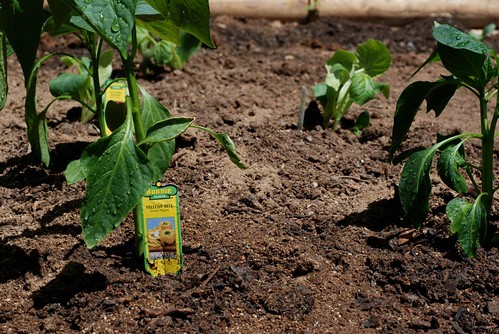
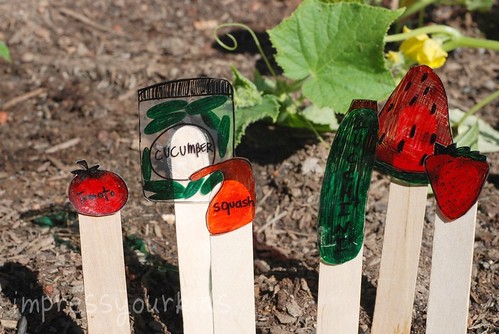
Now our little garden is so pretty I could just stare at it! But there was just one thing that bothered me...those little plastic garden stakes! They tell you how far apart to plant the veggies and when to water, but they are SO UGLY!

So, we decided to do something about it! We made our own garden stakes with our very own DIY Shrinky Dinks!

garden stakes craft

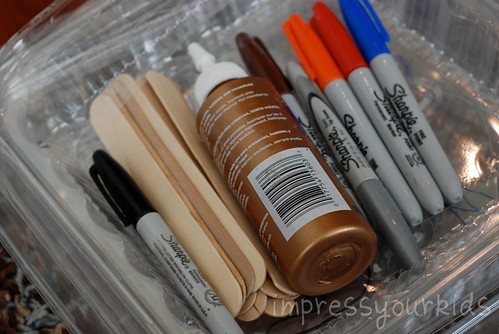
All you need is giant craft sticks, craft glue, permanent markers and #6 recyclable plastic. This is the plastic that comes on top of those tin disposable cake and casserole pans or on take-out containers. Don't throw 'em away--save them for crafts!

garden stakes craft

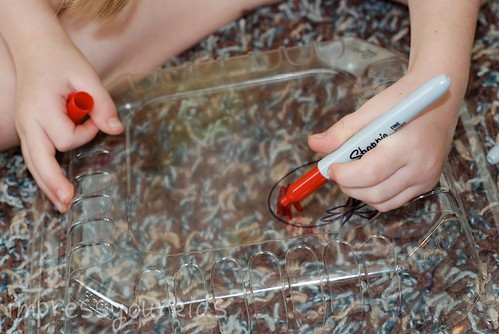
We drew pictures of each of our veggies--tomatoes, peppers, watermelon, strawberry and more. Then the kids colored them in. The important part here is the size. Shrinky Dinks...SHRINK. So, you want to make your pictures much larger than you want them.

garden stakes

You can see the size of this little squash was about 2-3 inches---it shrunk down to about an inch wide. I decided I liked them a little bigger, so I made our next few about 5-6 inches high so they would be about 3 inches after shrinking.

diy shrinky dink

Once they are colored and ready to go, just put them on a pan and bake at 350 for about 2 minutes. They will begin to curl up and move around the pan. But don't worry, the fall back down and will be almost perfectly flat after two minutes. If they are sticking up a little bit, just use a spatula to press them down while they are still hot from the oven.

shrinky dinks garden

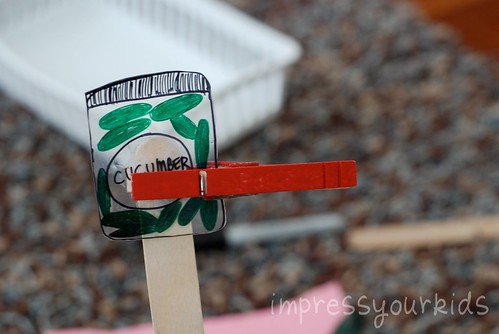
Next, glue them to a craft stick. These larger ones were a little bit wavy on the back so I used a clothespin to keep them in the right spot till the glue dried. {Our cucumbers are going to be pickles, so we made a jar of pickles for our stake!}

garden stakes craft

Finally it was time for planting our stakes! They look pretty cute, dontcha' think? Even the little ones add a little bit of color to the garden! And when the sun hits them they are almost like suncatchers!

You could use these to spell words (what if you cut out the letters GARDEN? Or MOM and put it in a potted plant for Mother's Day?), identify flowers or even just stick some in a bowl of fruit on your kitchen table!

Thank you, Angie for letting me guest post on your blog today! I'm honored to be here!

Amanda is a stay-at-home mom of two who blogs at Impress Your Kids. In her former life, Amanda was a Children’s Pastor — overseeing, organizing and developing ministry for kids in nursery through middle school, but now that she is a mom, her “skills” are used up on her kids!

Monday, December 6, 2010

Guest Post: Paint Stick Reindeer

I decided I wanted to include some guest posters this December on my blog.  I'm blessed to have some very crafty friends.  This is the first of several posting you'll see this month from my good friend, Anne.  She's been a slacker on her own blog lately, but she was nice enough to do Christmas postings for me and I SO appreciate it!  These reindeer of hers are super adorable!


Every time we go buy paint the guy behind the counter gives us at least 2 stir sticks for it, and usually, we buy the paint the day we are going to use it and it has just been stirred anyway… the result is a large pile of extra sticks. Add a bit of paint, some garland, ribbon and pipe cleaners… and poof, Reindeer!


We painted the sticks with acrylic paints, just the cheap dollar bottle stuff. We used paint pens for the faces and wooden balls for the noses.

Everything was held together with hot glue.

Stop by and visit Anne at Confessions and Scrap!

Saturday, April 10, 2010

Peanut Butter No-Bake Cookies

When I was pondering who I wanted to ask to be a guest blogger I knew I had to include Stephanie from Fun Foods on a Budget! and Steph, Jeff and Co.. Her blogs are filled with really inexpensive recipes and fun clothing makeovers. Thanks Stephanie for being my guest!

Hi everyone! I'm so excited to be a guest blogger for Angie. I love reading this blog and was honored when Angie asked me to contribute to it. Some of my favorite of Angie's posts are her recipes - they're easy, fun, and delicious. So I thought I'd add an easy recipe of my own. After all, what's more homemaker-ish than preparing delicious foods for your family?


I grew up eating no-bakes cookies made with peanut butter, oats, and chocolate. We called them "emergency cookies" because they were so quick and easy. But a few years ago I discovered that if you leave out the cocoa, you get peanut butter no-bake cookies, and boy are they delicious! I actually like these better than the chocolate variety. Here's the recipe I use.

Peanut Butter No-Bake Cookies

1/2 cup butter
2 cups sugar
1/2 cup milk
3/4 cup peanut butter
3 cups oats

Melt butter in large saucepan. Add sugar and milk and bring to a boil. Boil for 2 minutes.

Remove from heat. Add peanut butter and stir until peanut butter dissolves. Add oats and mix well.

Drop by spoonfuls onto wax paper or foil. Let sit at room temperature until hardened, or chill in refrigerator to harden more quickly.

Kids can help with these too. My kids (ages 4 and 2) love to help measure ingredients, spoon out cookies, and taste-test the finished product. :-)